Fixing Touchpad Lag on Lenovo ThinkPad T480 After Replacing with X1 Extreme Glass Touchpad

Introduction

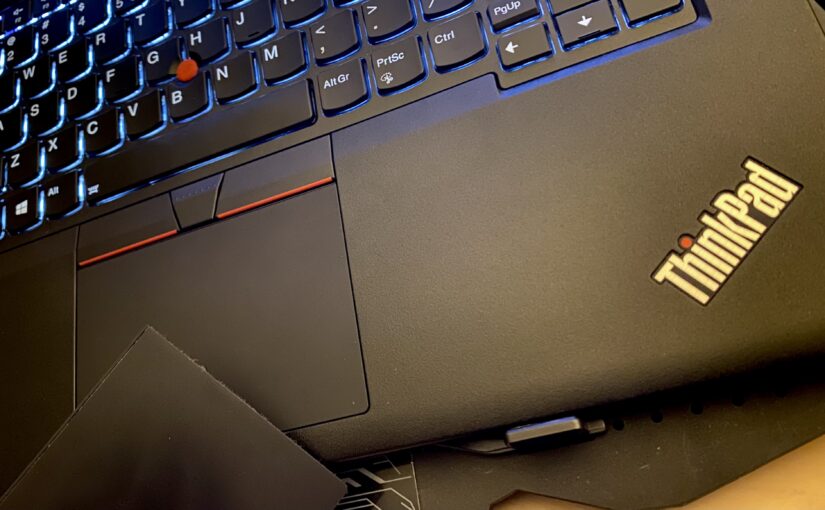
Upgrading your Lenovo ThinkPad T480 with a glass touchpad from the Lenovo X1 Extreme (Gen 1 or Gen 2) can significantly improve the user experience. However, many users encounter issues on Ubuntu where the touchpad becomes laggy and unresponsive. A temporary fix using:

sudo rmmod psmouse && sudo modprobe psmouse

restores smooth operation, but the issue reappears after a reboot or waking from sleep. In this article, we’ll walk you through a permanent fix to ensure a seamless touchpad experience.

Understanding the Issue

The T480 and X1 Extreme use different touchpad drivers and configurations. When swapping the trackpad, the kernel may not properly initialize it, leading to laggy or delayed cursor movements. Reloading the psmouse module manually fixes this but does not persist across reboots or sleep/wake cycles.

Step-by-Step Fix

1. Making the Fix Permanent on Reboot

To reload psmouse automatically after each reboot, create a systemd service:

Create the Service File

sudo nano /etc/systemd/system/fix-trackpad.service

Add the Following Content

[Unit]
Description=Reload psmouse module for trackpad fix
After=multi-user.target

[Service]
Type=oneshot
ExecStart=/bin/bash -c "sleep 2 && /sbin/rmmod psmouse && /sbin/modprobe psmouse"
RemainAfterExit=true

[Install]
WantedBy=multi-user.target

Enable the Service

sudo systemctl daemon-reload
sudo systemctl enable fix-trackpad.service

Reboot your system, and your touchpad should now work properly.


2. Fixing the Issue After Sleep/Wake

Since the lag returns after waking from sleep, we need to reload psmouse after resume.

Create a Sleep Hook Script

sudo nano /lib/systemd/system-sleep/fix-trackpad

Add This Content

#!/bin/bash

case $1 in
    post)
        /sbin/rmmod psmouse
        /sbin/modprobe psmouse
        ;;
esac

Make It Executable

sudo chmod +x /lib/systemd/system-sleep/fix-trackpad

Now, after resuming from sleep, the touchpad should work properly.


Conclusion

Replacing the stock touchpad on the Lenovo ThinkPad T480 with an X1 Extreme Gen 1/Gen 2 glass touchpad is a great upgrade. However, it introduces compatibility issues with Ubuntu, causing laggy behavior. The solutions above ensure that your touchpad works flawlessly across reboots and sleep/wake cycles, giving you the best user experience possible.

Vidutinis HTTPD, NGINX, MYSQL atminties resursų naudojimas

HTTPD:

ps -ylC httpd | awk '{x += $8;y += 1} END {print "Apache Memory Usage (MB): "x/1024; print "Average Proccess Size (MB): "x/((y-1)*1024)}';

NGINX:

ps -ylC nginx | awk '{x += $8;y += 1} END {print "Nginx Memory Usage (MB): "x/1024; print "Average Proccess Size (MB): "x/((y-1)*1024)}';

MYSQL:

ps -ylC mysqld | awk '{x += $8;y += 1} END {print "mySQL Memory Usage (MB): "x/1024; print "Average Proccess Size (MB): "x/((y-1)*1024)}';

PLESK domains mysql backup

Skriptas skirtas daryti kiekvieno domeno mysql duomenų bazių kopijas. Skriptą reikia vykdyti per cron užduotis.

/opt/mysql_local_backup/backup.sh

#!/bin/bash
# TIK PLESK VALDYMO ĮRANKIO SERVERIAMS

# === SETTINGS ===
DB_BACKUP="/opt/mysql_local_backup/dumps/"	# Galima keisti į sau patogų katalogą
DB_USER="admin"					# PLESKO DB pagrindinis vartotojas
DB_PASSWD=`cat /etc/psa/.psa.shadow`		# Slaptažodis
SYS_USER="root"					# Jeigu nurodomas docrootas ir norima, per FTP pasiekti failus
GROUP="root"					# Grupė, taipat nurodoma. Pleske dažniausiai psacln
# ================

# Kuriama direktorija
/bin/mkdir -p $DB_BACKUP

# BACKUP DARBAS
while read DOMAIN DB
	do
		/usr/bin/mysqldump --user=$DB_USER --password=$DB_PASSWD $DB | /usr/bin/gzip > "$DB_BACKUP/$DOMAIN-$DB-$(date +%Y-%m-%d_%H%M).sql.gz";
	done < <(/usr/bin/mysql --user=$DB_USER --password=$DB_PASSWD -NBe "use psa; select domains.name, data_bases.name from domains, data_bases where data_bases.dom_id=domains.id;")

# Keičiamas failų owneris:
/bin/chown -R $SYS_USER:$GROUP $DB_BACKUP
# Valomi seni backupai:
/usr/bin/find $DB_BACKUP -type f -mtime +3 -name "*.sql.gz" -exec /bin/rm -rf {} \;

Cron paleidimas kas naktį (galima ir dažniau, priklausomai nuo duomenų bazių dydžio ir duomenų svarbumo):

/etc/cron.d/mysql_local_backup.cron

50     4      *       *       *       root /opt/mysql_local_backup/backup.sh 1>/dev/null 2>&1

BIND raw zonos konvertavimas į tekstinę

Iš raw į tekstinę:

# convert raw zone file "example.net.raw", containing data for zone example.net,
# to text-format zone file "example.net.text"
#
#   (command)     (format options)   (output file)  (zone origin) (input file)
named-compilezone -f raw -F text -o example.net.text example.net example.net.raw

Iš tekstinės į raw:

# convert text format zone file "example.net.text", containing data for zone
# example.net, to raw zone file "example.net.raw"
#
#   (command)     (format options)   (output file) (zone origin)  (input file)
named-compilezone -f text -F raw -o example.net.raw example.net example.net.text

CENTOS7 diegiam IPTABLES

Deaktivuojame firewalld:

# systemctl mask firewalld

Sustabdome firewalld servisą:

# systemctl stop firewalld

Diegiame iptables:

# yum -y install iptables-services

Įsitikiname, kad po perkrovimo pasileidžia iptables:

# systemctl enable iptables

* jeigu naudojame ipv6:

# systemctl enable ip6tables

Paleidžiame iptables:

# systemctl start iptables

* ip6tables paleidžiame jeigu naudojamas ipv6:

# systemctl start ip6tables

Ieškome daugiausiai failų turinčius katalogus

Surandame katalogus, kurie turi daugiausiai failų:

Šaltinis: http://askubuntu.com/a/316194

#!/bin/bash

if [ $# -ne 1 ];then
  echo "Usage: `basename $0` DIRECTORY"
  exit 1
fi

echo "Wait a moment if you want a good top of the bushy folders..."

find "$@" -type d -print0 2>/dev/null | while IFS= read -r -d '' file; do 
    echo -e `ls -A "$file" 2>/dev/null | wc -l` "files in:\t $file"
done | sort -nr | head | awk '{print NR".", "\t", $0}'

exit 0

Dar vienas būdas:

Šaltinis: http://unix.stackexchange.com/a/117094/100727

find / -xdev -printf '%h\n' | sort | uniq -c | sort -k 1 -n

PLESK self-signed SSL atnaujinimas per CLI

Naujausias FIREFOX pasibaigus SSL sertifikatui neleidžia prisijungti prie serverio panelės. Yra du būdai kaip atsinaujinti. Tai pirmas prisijungus per CHROME naršyklę ir atsinaujinti arba antras būdas, kuris čia aprašytas, tai per terminalą.

Instrukcija:

  • Prisijungiame prie serverio su root vartotoju.
  • Einame į plesk admin direktoriją ir pervadiname seną sertifikatą:
    # cd /usr/local/psa/admin/conf/
    # mv httpsd.pem{,.old}
    
  • Kuriame naują sertifikatą:
    # openssl req -new -nodes -x509 -out httpsd.pem -newkey rsa:2048 -keyout httpsd.pem -days 3650
    
  • Šiame žingsnyje paprašys užpildyti kai kuriuos duomenys. Juos užpildome teisingai.
  • Atnaujinus SSL perkrauname PLESK valdymo pultą:
    # service sw-cp-server restart
    
  • Ubuntu 14.04 ipv6 išjungimas

    Naudojant ubuntu 14.04 kartais kyla problemos su tinklu ir greitaveika. Sprendimas išjungti IPv6 išjungimas.

    Modifikuojame faila: /etc/sysctl.conf

    Tiesiog failo pabaigoje įrašomos eilutės:

    net.ipv6.conf.all.disable_ipv6 = 1
    net.ipv6.conf.default.disable_ipv6 = 1
    net.ipv6.conf.lo.disable_ipv6 = 1
    

    Išsaugoju failą paleidžiame komandą: sudo sysctl -p